Using the login authentication feature to share apps
Add the following fields to the application that you want to share on Chobiit.
Date and time field (1): Record the date and time when a record is created from Chobiit
Text field (1): Record the record creator from Chobiit
Date and time field (2): Record the date and time when a record is updated from Chobiit
Text field (2): Record the record updater from Chobiit
Text area field: Added if the record will be shared with a group
In the Chobiit plug-in settings, navigate to the “App Settings” tab. Click the “+ New” button. Search for the app to be shared in the search field.
Select “With authentication” as the “Authentication” type.
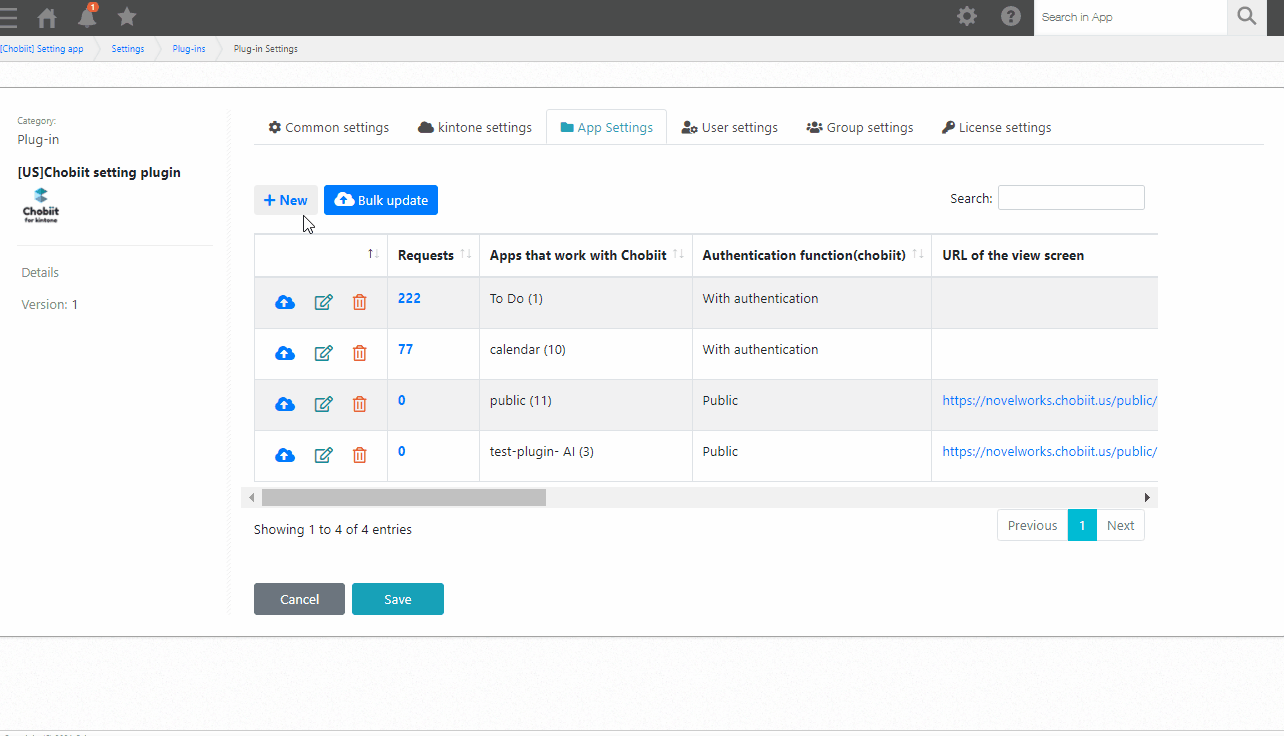
Scroll to the “Field settings” section at the bottom of the settings modal. Set the “Chobiit record creator”, “Created datetime”, “Chobiit record updater”, and “Updated datetime” drop-downs with the fields created earlier in the app to be shared. Click “Save” in the settings modal.
Check that the app to be shared has now been added to the table.
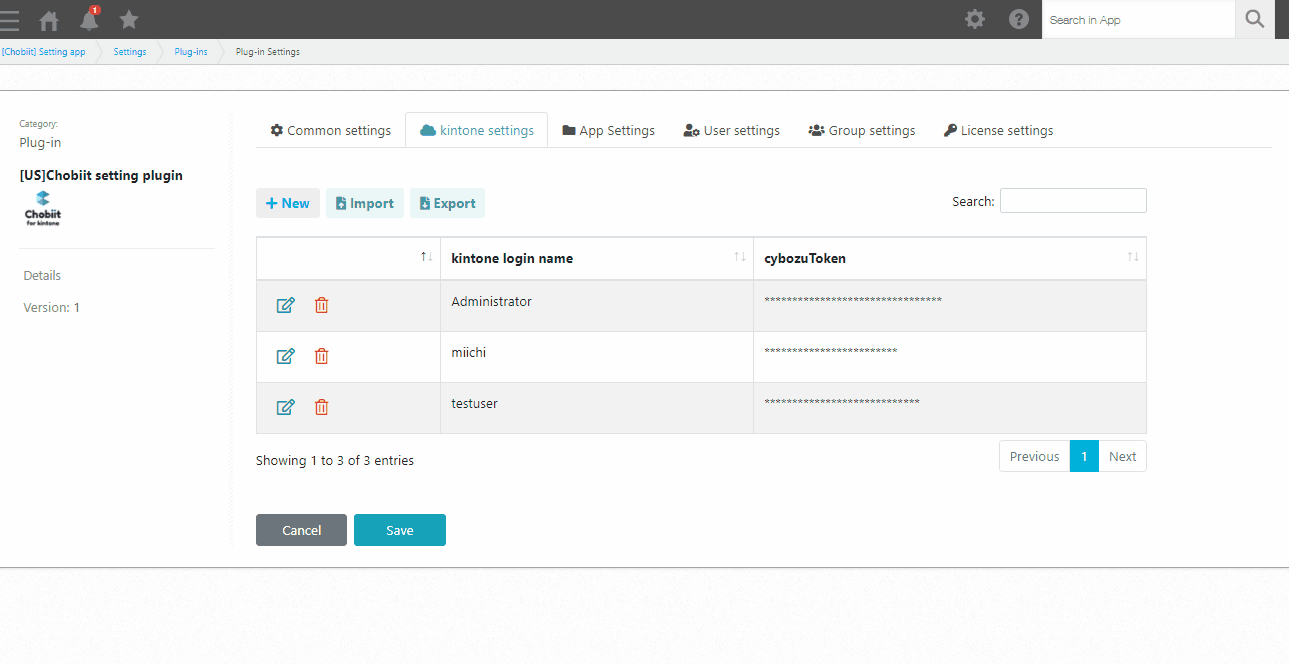
Set the Kintone account that will be used to generate Chobiit users
Navigate to the “Kintone Account Settings” tab in the Chobiit plug-in settings. Click the “+ New” button. Select the desired Kintone account from the drop-down list and enter in the password of the user. Click “Save” to add the account.
Remember that users generated by Chobiit inherit the access permissions associated with the linked Kintone account. To change the viewing and editing permissions of a Chobiit user, change the permissions of the associated Kintone account on the Kintone side.
Note that the linked Kintone account must not be using Two-factor authentication. Also note that if the password of the linked Kintone account is changed, the password registered in the Chobiit plug-in settings must also be updated.
Generate Chobiit users
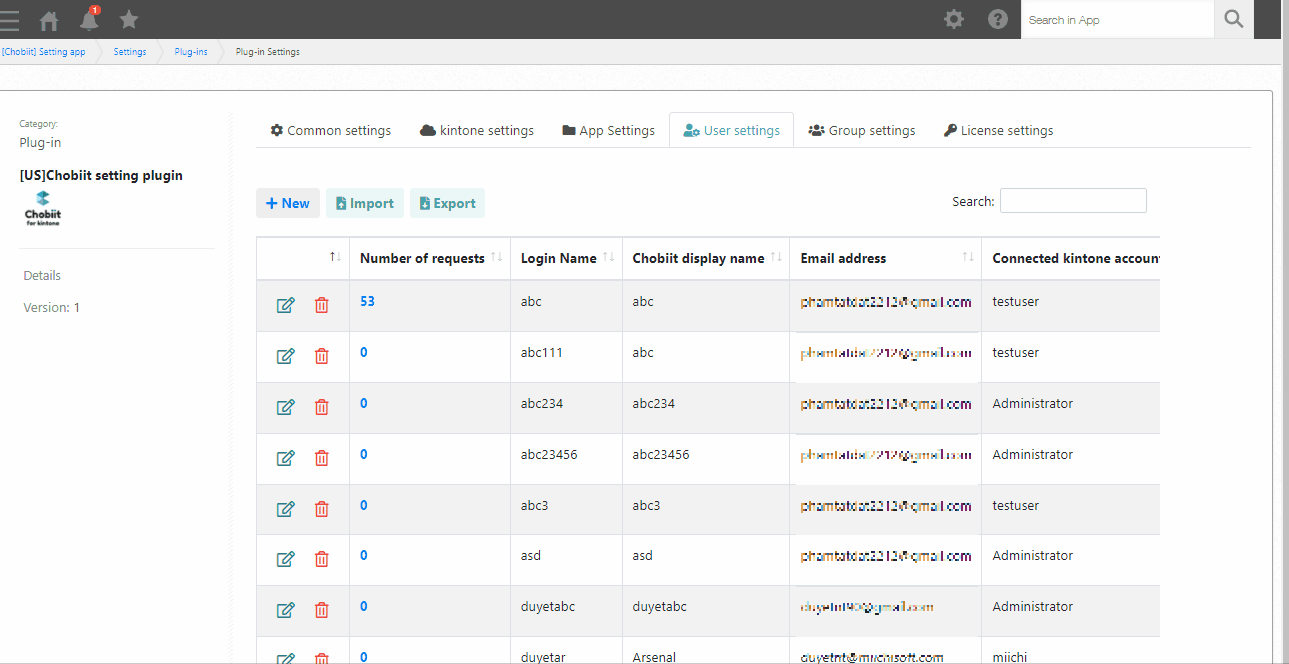
Navigate to the “User Settings” tab in the Chobiit plug-in settings. Click on the “+ New” button. Fill in the “Chobiit Login Name”, “Chobiit display name”, and “Email address” of the account. Select the “Connected kintone account” from the drop-down list of Kintone accounts linked in the “Kintone Account Settings” tab. Finally, select all the apps to share with the user from the “App” table under the “Select the app you want to use with Chobiit” setting.
- Each Kintone license can generate 100 Chobiit accounts.
- The login name of a Chobiit account must be unique.
- The linked Kintone accounts in the “Kintone Account Settings” tab will be displayed in the drop-down list of the “Connected kintone account” setting. The registered apps in the “App Settings” tab will be displayed in the drop-down list of the “App” table setting.
Click “Save” and enter in an initial password for the account. Confirm the email contents. After set up is complete, the initial Chobiit login information will be sent to the email address entered into the “Email address” setting.
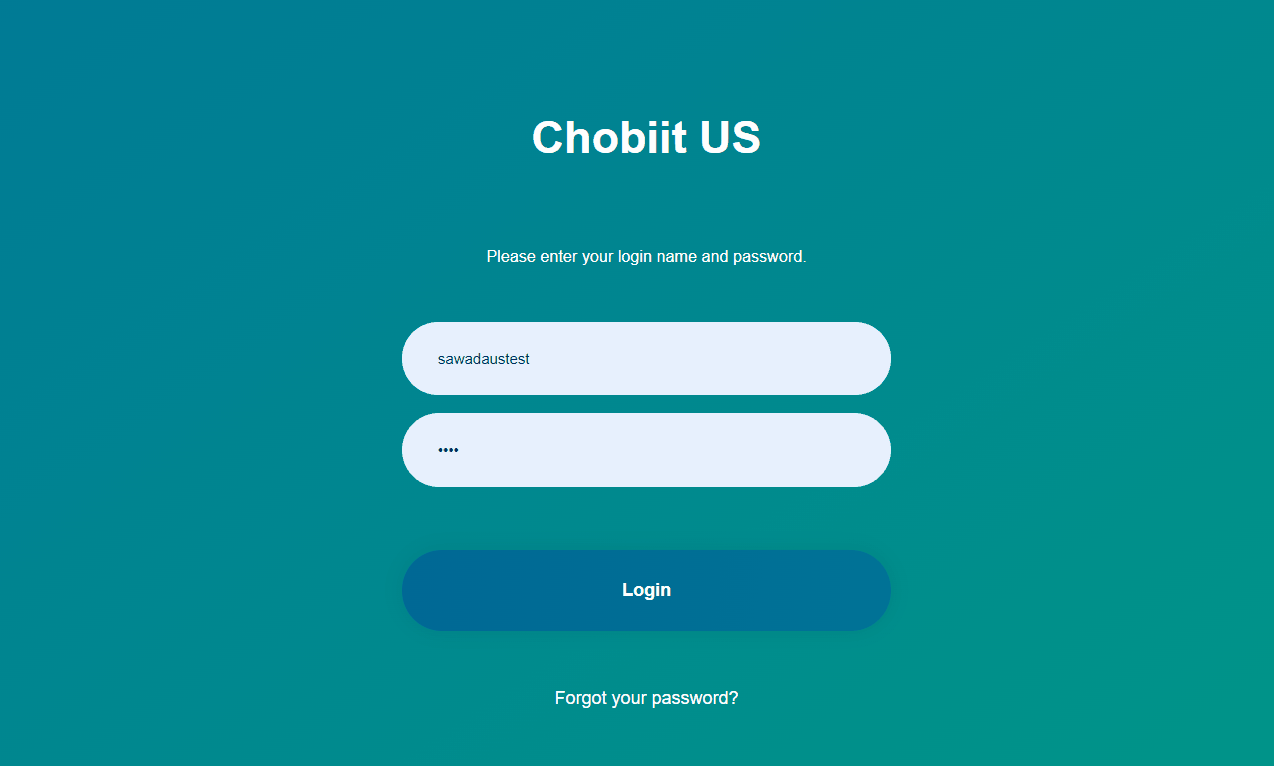
When a Chobiit user logs in, they will see the following screen.
Upon logging in, only apps shared with the user will be displayed.