Using a Kintone app as a web form
Create the Kintone app to use as a web form.
Generate an API token in the app. Copy the API token.
Give the API token the following permission: Add records

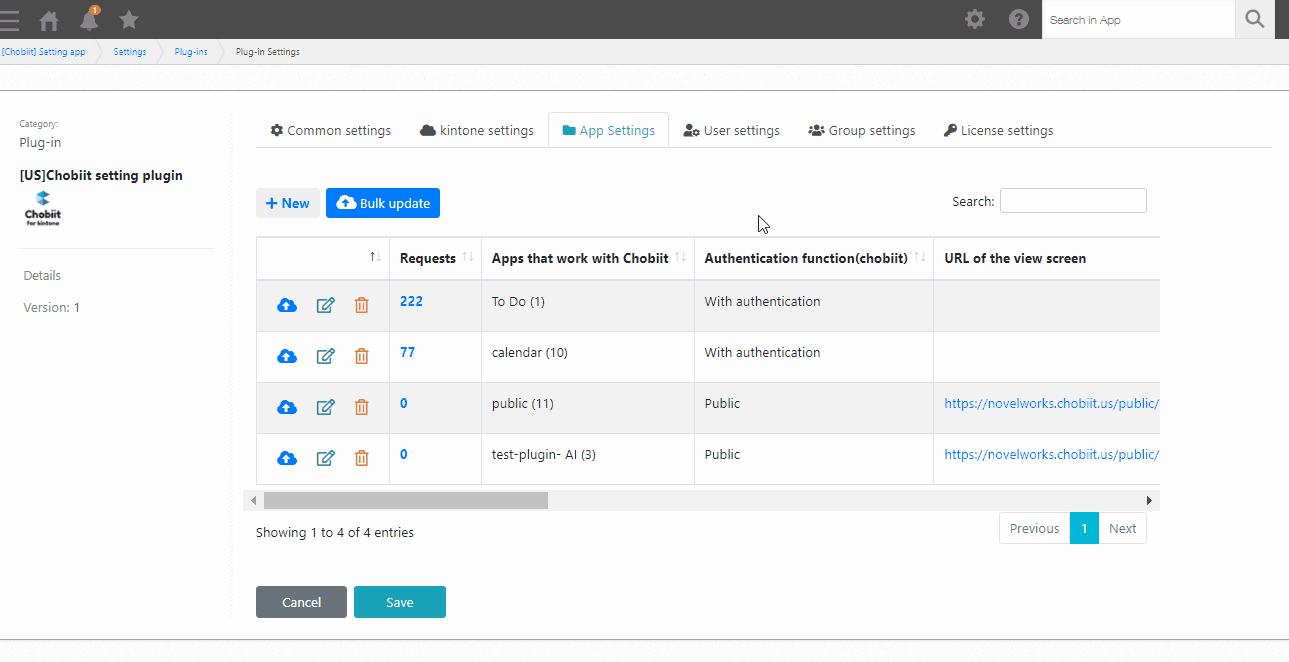
In the Chobiit plug-in settings of the [Chobiit] Setting app, navigate to the “App Settings” tab. Click the “+ New” button to add a new app, and select the created web form app from the search field.
Authentication
Select “Public” as the authentication type.
API token
A settings section called “Public settings” will appear. Paste the copied API token from the web form app in the “API token of this app” field.

Feature settings
This setting allows a public user to view and/or add records in this app. When using an app as a web form, enable the “Add records” setting only. When toggled on, the URL and iframe tags of the web form are generated and displayed.
Enable bot check
A setting under the “Display settings” section, the “Enable bot check” setting adds an extra step when submitting a form to check whether the submitter is a real human or a bot.
Enable field display conditions
A setting under the “Display settings” section, the “Enable field display conditions” setting allows any field to be set as hidden or uneditable. A hidden field is not shown to the user filling in the web form. An uneditable field prevents the user from making any changes to a field. If the field display condition is off, you can “view” and “add” all fields.
Page display settings after saving a record
Navigate to the “Other settings” tab. Toggle the “Page display settings after saving a record” and use the rich text editor to set a message of choice to be displayed after a user submits a record.
Save the Chobiit settings and update the app.
Now records can be added to a Kintone app by submitting the form located at the generated URL.